Multidal

The Multidal is a robust and versatile stabilization grid and can be used in combination with either grass or gravel. Manufactured from 100% recycled HDPE, this product combines durability and ease of use.

Find your distributor, price request or product question?

How many buckets of joint filler do I need?

Enter the dimensions below and we will calculate how many buckets you need.

Choose a product:
Choose a colour:
According to our calculations you need 0 kg.

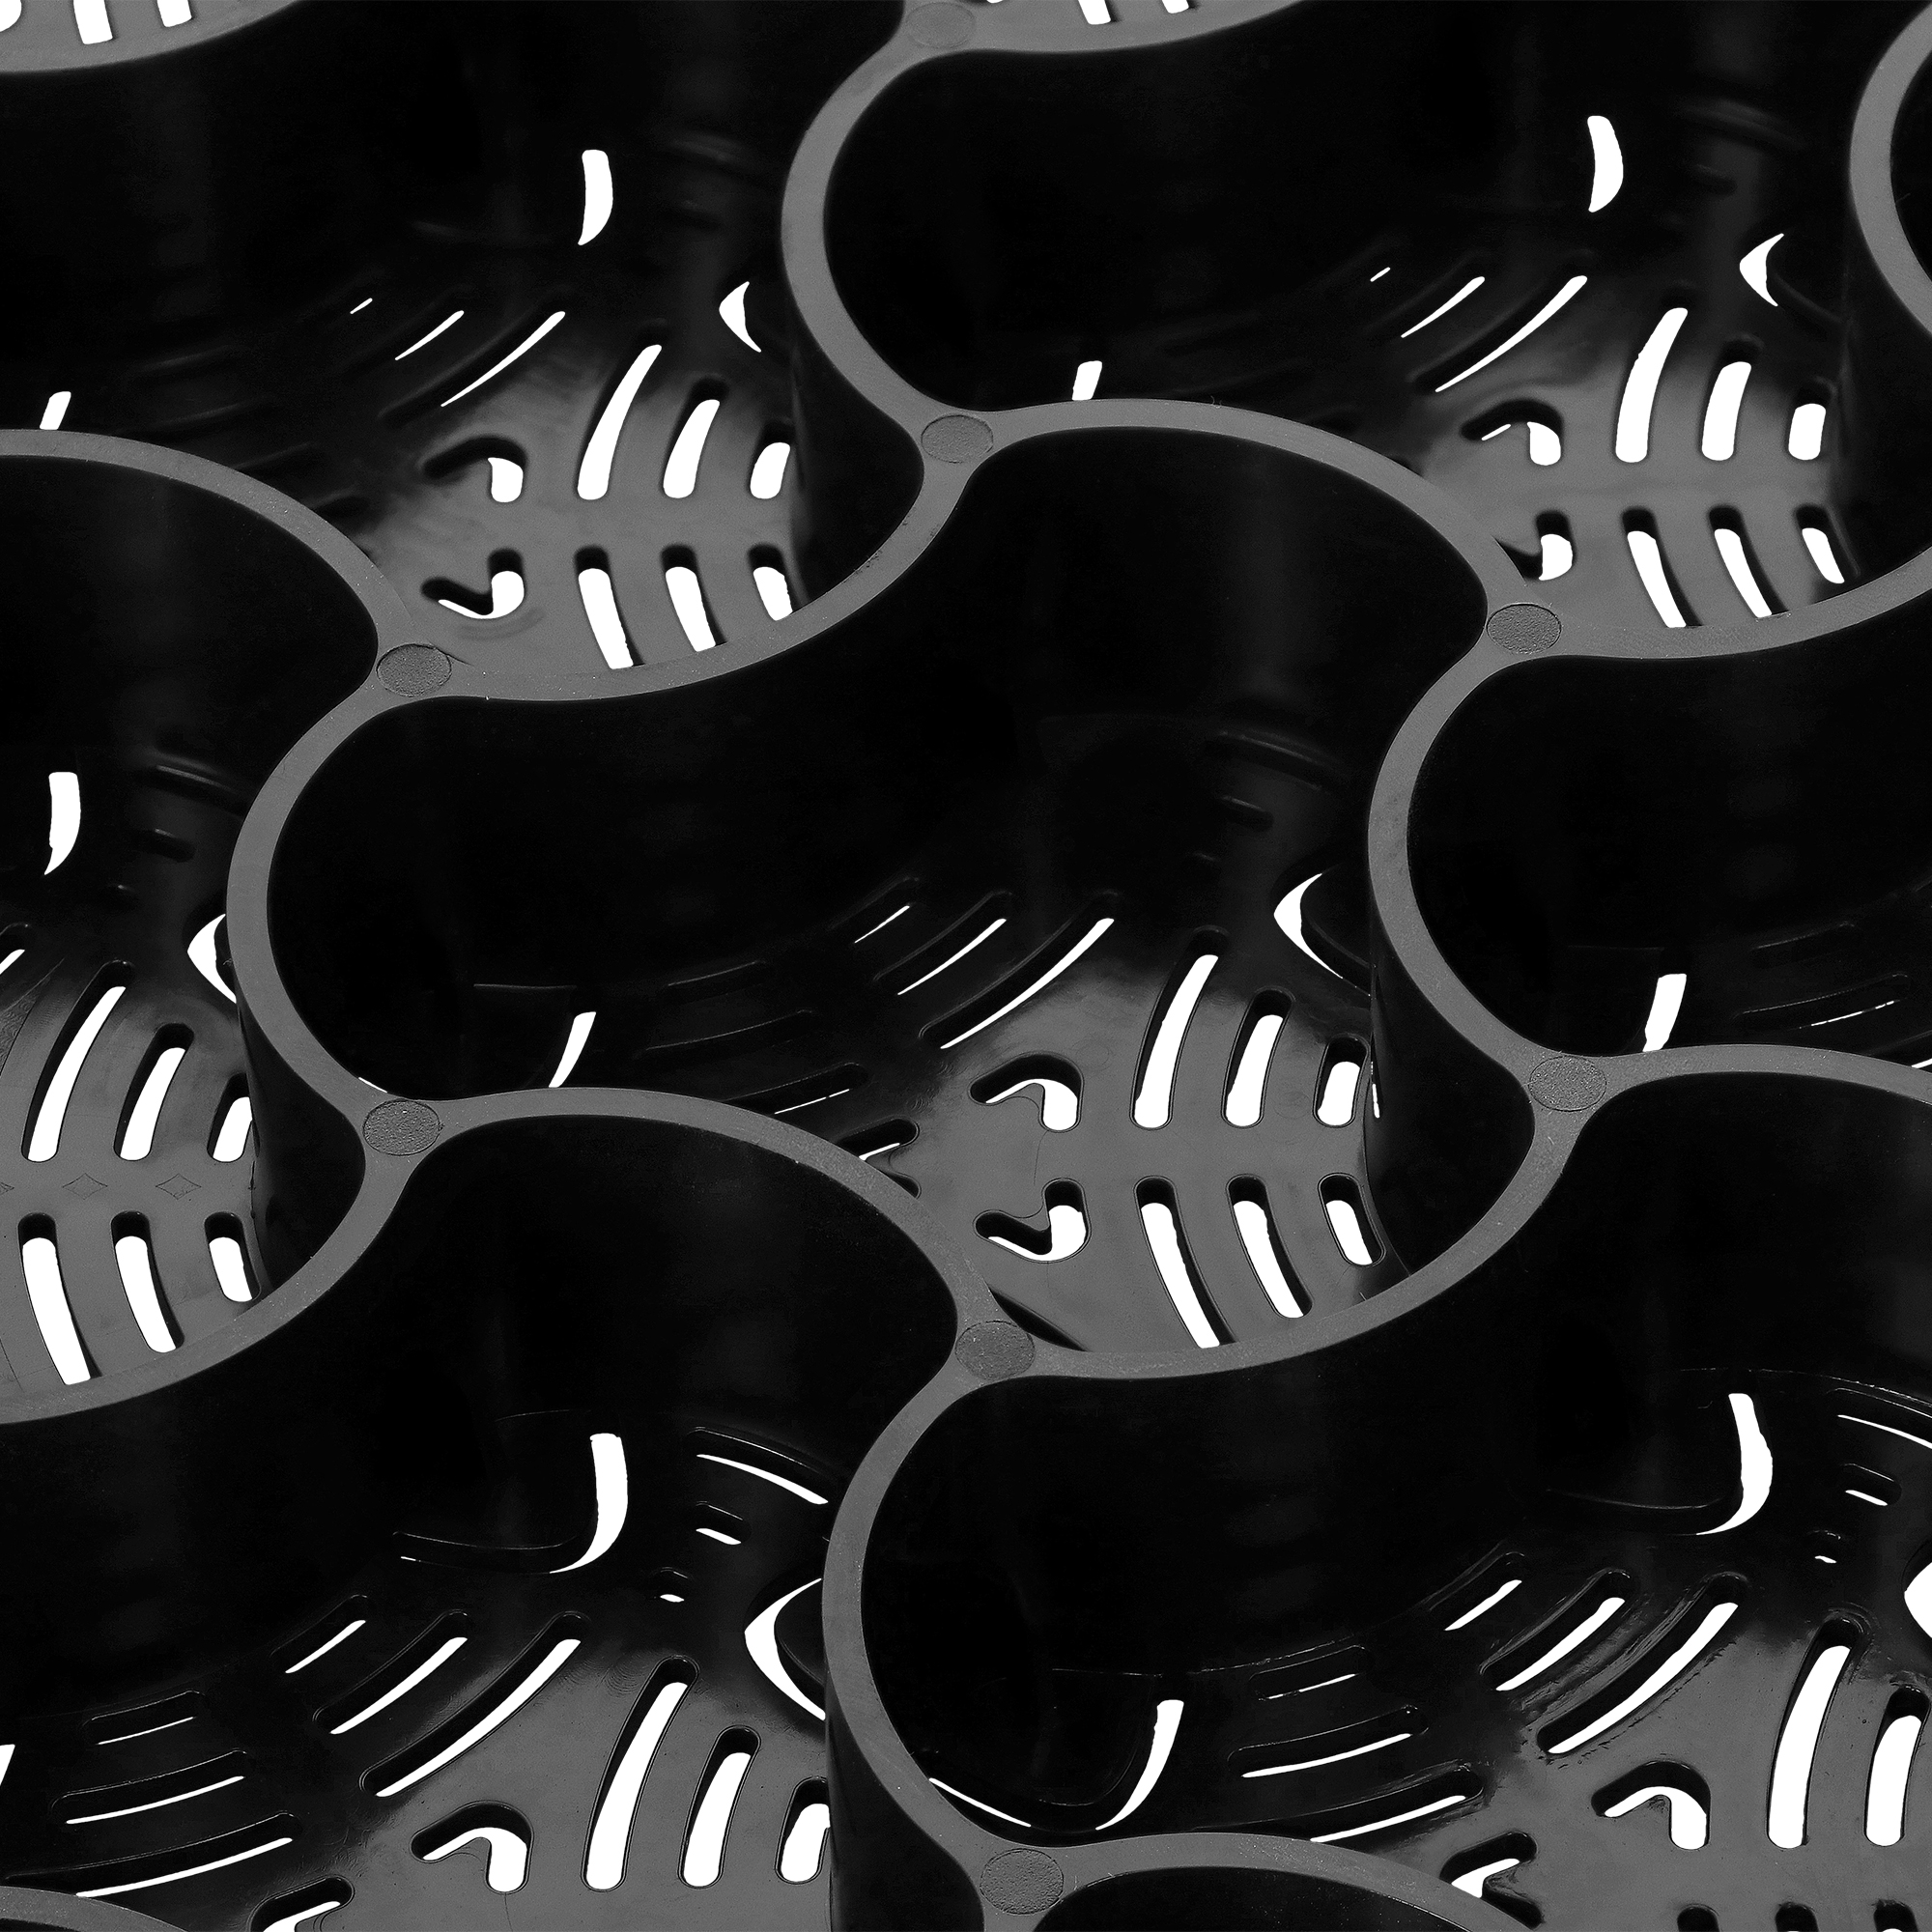
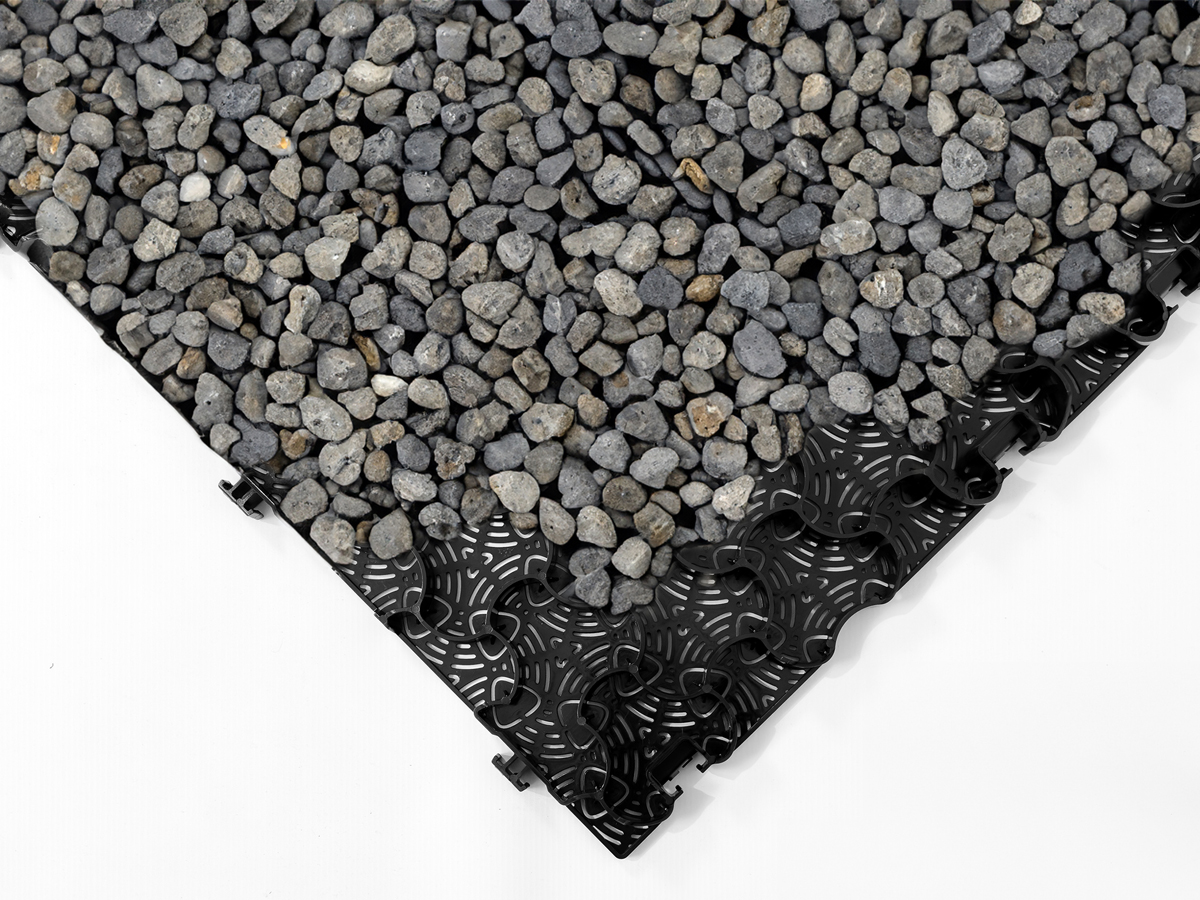
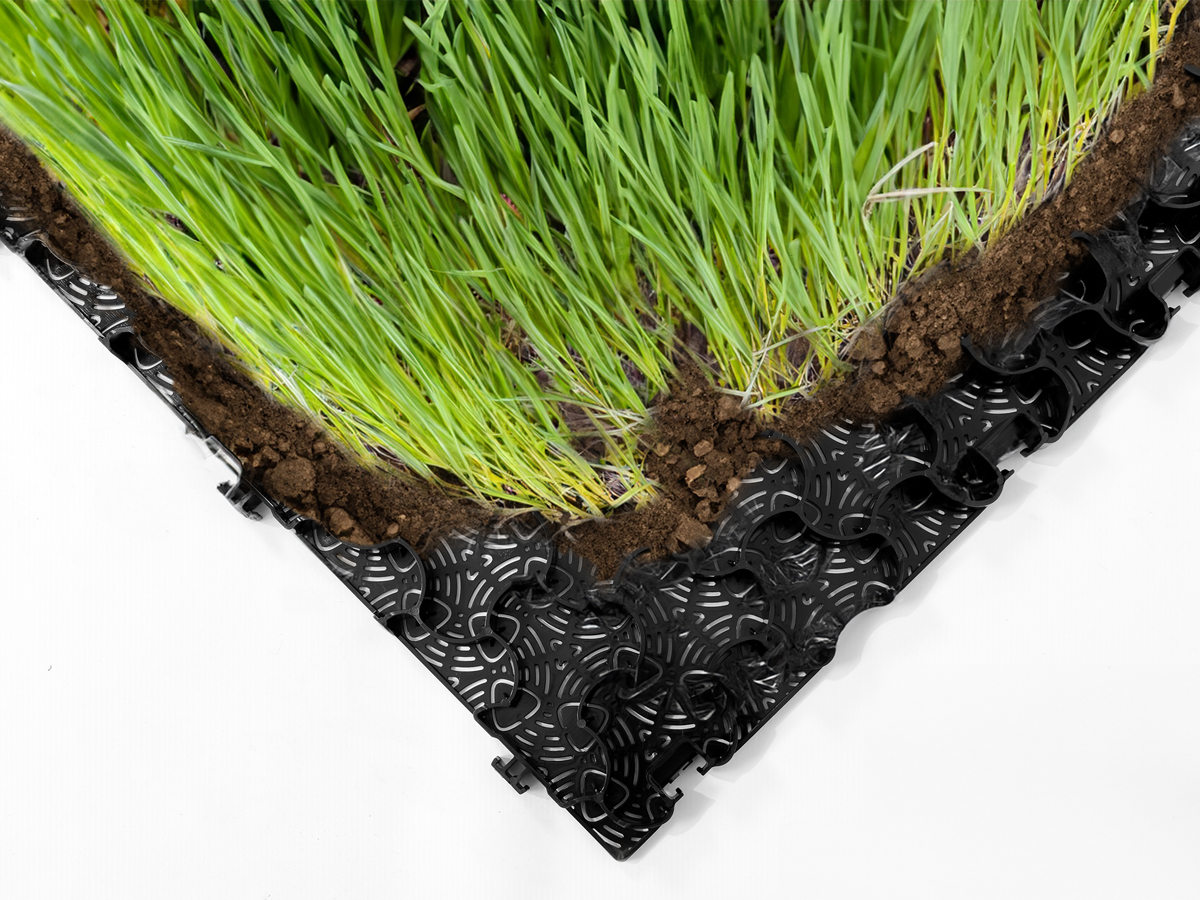
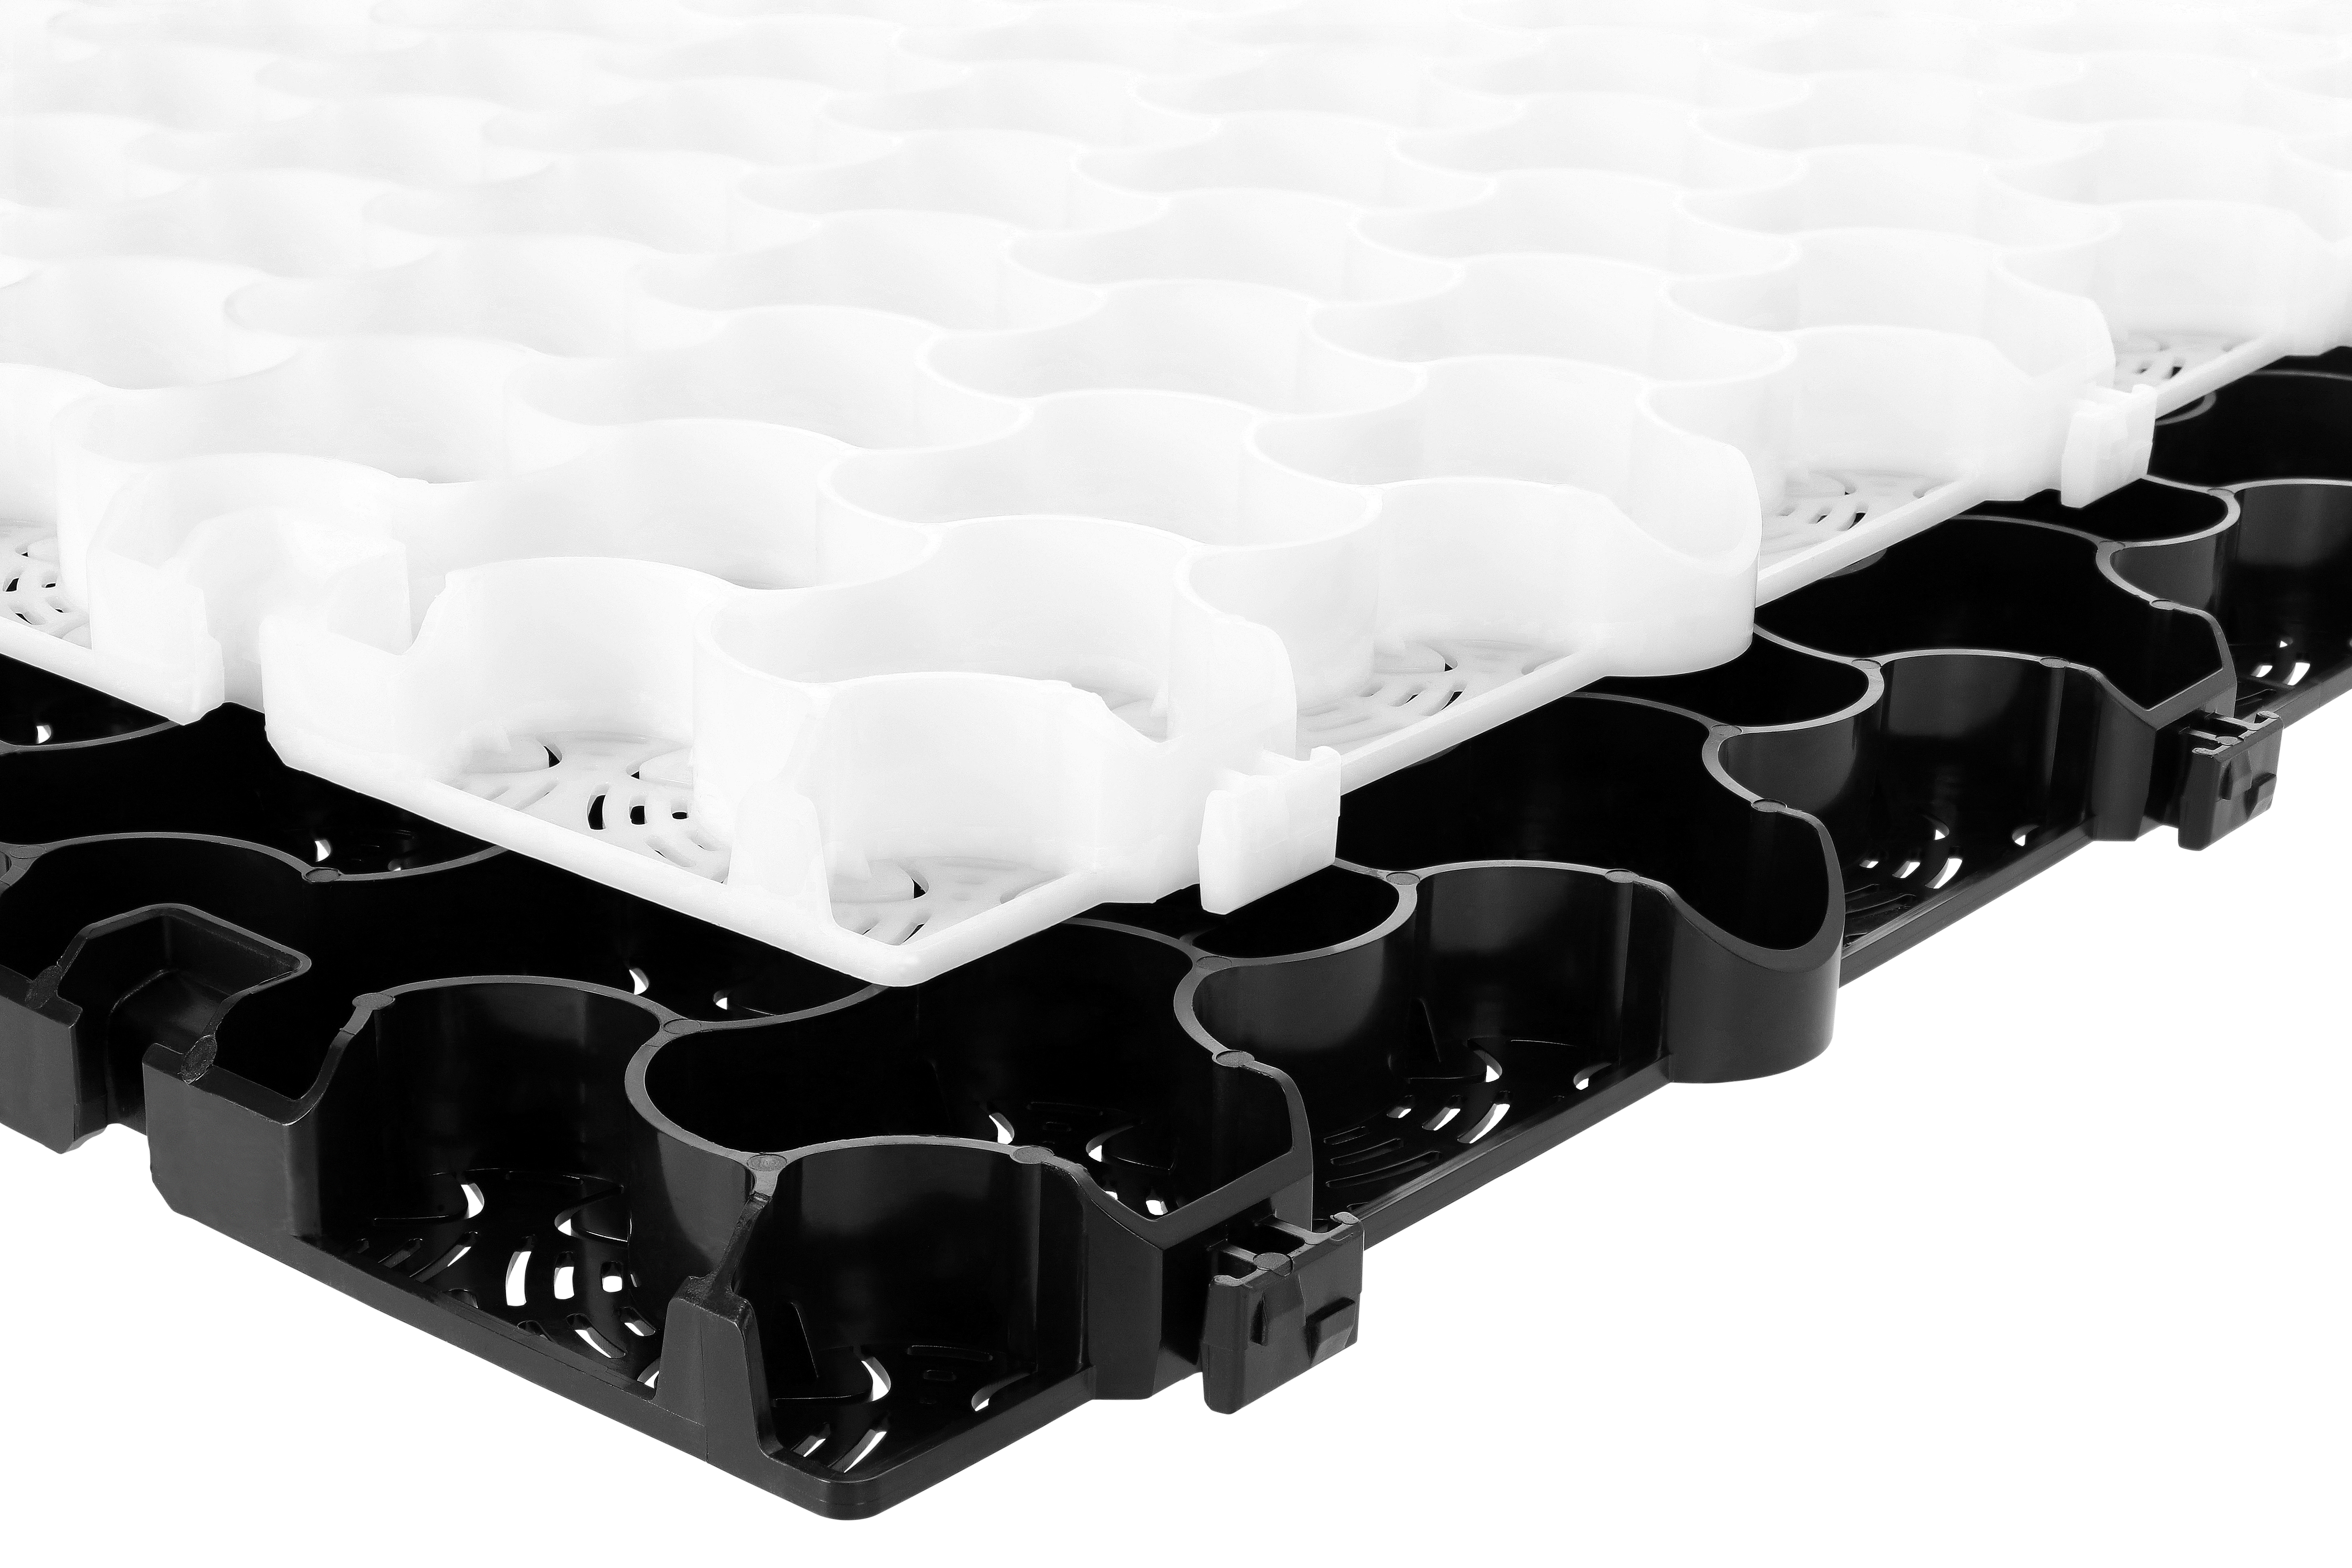
ECCO’s Multidal is the latest solution for soil stabilisation. Durably designed with an innovative connection system and excellent for either grass or gravel filling.
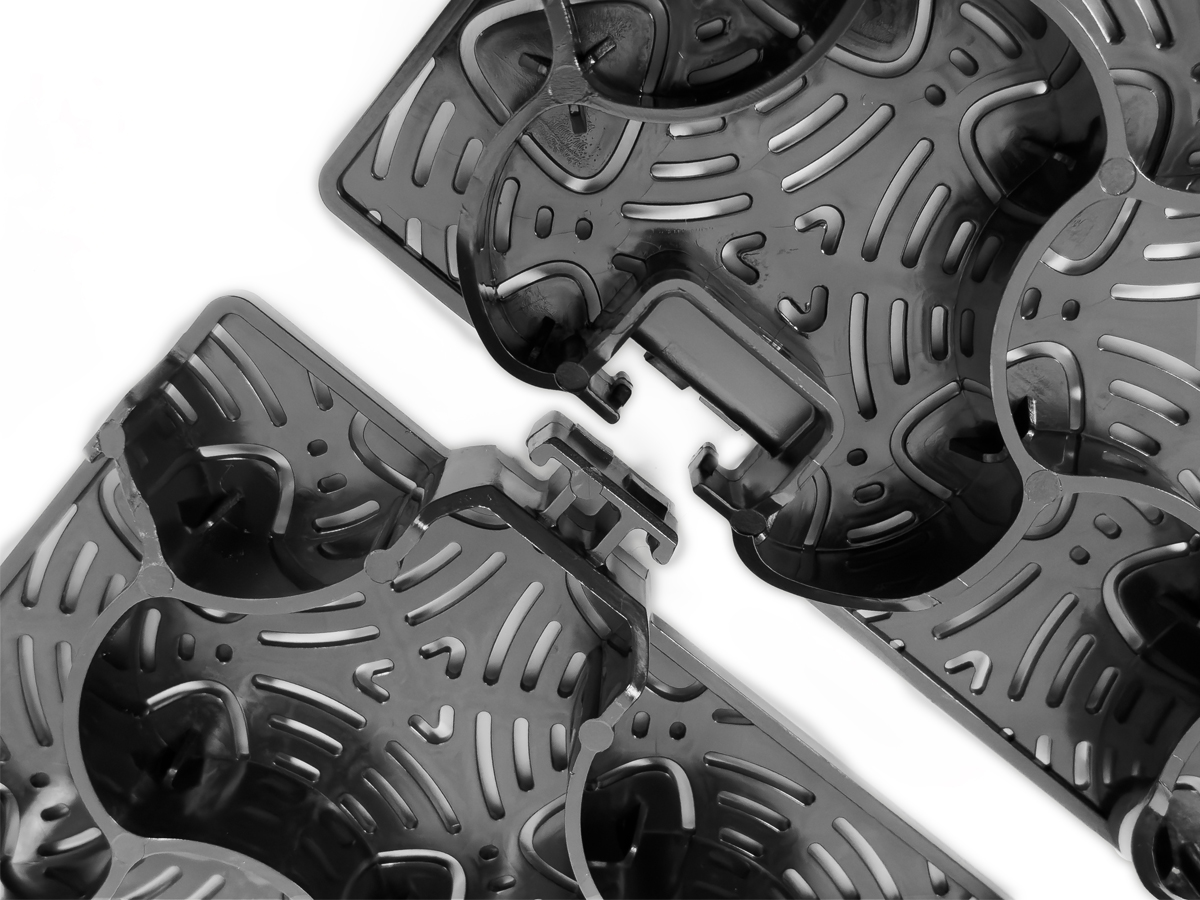
 One of the biggest advantages of our Multidal is the easy installation and maintenance. The design allows for quick and ergonomic installation thanks to the simple connection system, which allows you to easily snap the grids together. Multidal is made of 100% recyclable HDPE. Thanks to the design and choice of materials, this grid has a high compressive strength and impact value, ideal for intensive and frequent traffic. The closed bottom of Multidal provides great stability yet is highly permeable to water, preventing puddles. In addition, the grid is suitable for filling with both grass and all gravel with a size up to 25mm. Whether for driveways, fire roads, garden paths or even sloping areas, Multidal provides a stable surface that is walkable and passable. Multidal is a durable stabilisation grid that guarantees years of quality.

Products

Product code Name Quantity Dimensions
11060 Multidal Black 76pcs/pallet Dimensions pallet: 120 x 80 x 242cm
11068 Multidal White 76pcs/pallet Dimensions pallet: 120 x 80 x 242cm

Benefits

  • Ergonomic and quick installation through simple connection system
  • Designed to be filled with either grass or gravel
  • Suitable for all gravel types with a size up to 25 mm
  • High tensile strength: withstands heavy loads, ideal for frequent traffic
  • Ideal for intensive and frequent traffic
  • Closed bottom for stability yet highly permeable to water
  • Sustainability: 100% recyclable HDPE
  • Suitable for inclined surfaces
  • Maintenance-friendly
  • Available in 2 colours: black (100% recycled material) or white

Applications

  • Driveways
  • Fire roads: reliable solution for emergency access
  • Garden and walking paths
  • Public parking lots and grounds: suitable for large areas with frequent traffic
  • Inclined areas
  • Paths in vegetable gardens and cultivation areas: supports heavy garden equipment and is environmentally friendly
  • Event grounds: provides a solid surface that can withstand large crowds

Applications with gravel

Step 1: Excavation

Perform the necessary excavation works. Always remove the topsoil. The bearing capacity of this layer must be at least 20 Mpa.

Step 2: Borders

Install the borders. These should extend 2 cm above the level of the top of the plate.

Step 3: Foundation (only for vehicular applications)

Place the foundations/sub-foundation at a depth of at least 25 cm. MWork in layers of 20 cm at the most, and compact with a plate compactor. The foundation may consist of limestone rubble, porphyry rubble, or crushed concrete rubble (chip size: 0-32 mm or 0-40 mm).

Step 4: Levelling layer

Place the leveling layer in fine gravel, compact and level. Add the fine gravel, compact and level. The depth of the levelling layer for vehicular applications must be 5 cm, for non-vehicular applications 15 cm. The levelling layer may consist of limestone or porphyry (chip size: 2-4 mm, 1-3 mm, or 0-4 mm) or sieved sand.

Step 5: Multidal

a. Place the first Multidal parallel to the border.

b. Thanks to the new connection system, you easily connect the next grid. You can also disconnect it again, if necessary.

c. We recommend laying the grids in stretcher bond. Start the second row with half a grid, the Multidal is easily cut with a disk cutter.

d. The third row starts with a full grid. Repeat the previous steps and finish the entire area in this way.

Step 6: Gravel

Add the gravel. It is not recommended to drive on unfilled grids. Level with a shovel, brush, rake, and squeegee. Do not compact the ornamental gravel. Allow the gravel to exceed the grids by 1 to 2 cm (1cm for finer and 2 cm for coarser types of gravel). Due to natural compaction, the gravel will still slightly settle. Eventually, there should be just enough gravel to hide the Multidal.

Additional advice

It is not recommended to use brick rubble as a foundation, as it pulverizes over time. For vehicular applications, we recommend a size of 8 to 25 mm (smaller gravel types will stick in the wheels). For non-vehicular applications , we recommend a size of 4 to 25 mm (smaller gravel types will eventually pulverize).

Applications with grass

Step 1: Excavation

Perform the necessary excavation works. Always remove the topsoil. The bearing capacity of this layer must be at least 20 Mpa.

Step 2: Borders

Place the borders. They should extend 2 cm above the level of the top of the grid.

Step 3: Foundation (only for vehicular applications)

Place the foundations/sub-foundation at a depth of at least 25 cm. Work in layers of 20 cm at the most, and compact with a plate compactor. The foundation case can consist of: lava, limestone pebbles, porphyry pebbles or crushed concrete rubble (chip size distribution: 16-32 or 20-40 mm). Hollow spaces (about 80%) should be filled with soil.

Step 4: Substrate levelling layer

Place the substrate levelling layer. The depth of the levelling layer for vehicular applications must be 5 cm, for non-vehicular applications 15 cm. The levelling layer preferably consists of lava (chip distribution: 0-4 mm).

Step 5: Multidal

a. Place the first Multidal parallel to the border.

b. Thanks to the new connection system, you easily connect the next grid. You can also disconnect it again, if necessary.

c. We recommend laying the grids in stretcher bond. Then start the second row with half a grid, the Multidal is easily cut with a disk cutter.

d. Start the third row start with a full grid again. Repeat the previous steps and finish the entire area in this way.

Step 6: add the substrate

Add the substrate to the Multidal up to 1 cm (max 0.5 cm) from the edge of the grid. You can use a self-compacting substrate, that way you no longer need to brush out anything as the substrate will compact naturally.

Step 7: Sowing

Sow the grass in Multidal

Inspect a few weeks after first use and brush out if necessary.

Technical specifications

  • Grid dimensions: 113.2 x 78.3cm (0.89m²)
  • Grid height: 3cm
  • Material: 100% HDPE – high-density polyethylene
  • Color: black or white
  • Weight: 3.75kg
  • Compressive strength empty: 300+ tons/m²
  • Gravel per m² = 65kg

How does gravel type affect weed growth in Multidal?

Can I completely avoid weed growth with an weed membrane?
Although an weed membrane helps to limit weed growth from the subsoil, weed seeds spread by nature cannot be completely avoided. Even with a root cloth, seed floating in the air will find its way to the layer above the cloth.

How can I further reduce weed growth?
Choosing the right gravel type is essential. By choosing a harder, less porous gravel, the amount of weeds growing through the top layer can be reduced. This is because there is less room for the weeds to establish themselves.

Is it necessary to place a weed membrane under multidal?
A weed membrane under multidal will help limit weed seeds that fall to the ground from growing through the multidal. However, it does not prevent weed seeds from landing on the surface and germinating there. It contributes to a more low-maintenance surface but does not guarantee complete prevention of weed growth.